Saturday, 9 July 2011

Creative Expressions Calling Card Challenge

Hello bloggers hope you are all well. I have decided to enter the Creative Expressions design team challenge which has been titled Calling Card. After doing a bit of research it turns out that amongst other things a "calling card" is an ATC type card that was given as part of contacting like minded people in the early 19th Century. Typical, I thought, as I have never made an ATC in my life as I must confess I couldn't see the point of them. Why would I want to make a card measuring 2 1/2 inches by 3 1/2 inches ? But after making the six for this project I am definitely converted as I really enjoyed designing them.


I started off by making the calling card case. For this I die cut 3 Labels 8 nesties. 2 from chipboard and one from black cardstock. The chip board labels were painted with Gesso and then inked with Tim Holtz Distress inks before being over stamped in Weathered Wood distress ink using the cracked paint effect stamp from Words Like Honey. The sunflower was created by using a melt pot, ultra thick embossing enamel, and yellow melt pot dye. The melted UTEE was poured into a sunflower mould and when cool was coloured with latte and gold alcohol inks and then mounted onto die cut circles before being glued to the front chip board die cut using Pinflair glue gel.


The inside of the case was made by attaching lengths of foam board around the edges of the other chipboard die and then painted with black acrylic paint. The inside is covered with black card that has been stamped with the cracked paint stamp using weathered wood distress ink. The outside of the strips has been covered with a length of brown self adhesive ribbon to hide the joins at the corners. For the hinges two lengths of black ribbon were glued to the back strip of the case. The other ends were attached to the reverse side of the front panel (lid). Once the black cardstock nestie label has been stamped with the cracked paint stamp it can be glued to the reverse side of the cover to hide the black ribbon hinges. I cut a piece of black cardstock to fit the inside of the case and stamped it with the cracked paint stamp using weathered wood distress ink.


Here you can see the calling cards fit nicely in the finished case.


The first card was made using a set of stamps from Stamp Addicts. The base card was covered with broken china and mustard seed distress inks. The gazebo was stamped using vintage photo distress ink and then a water brush was used to pull some of the colour out to colour in some of the image. The cross keys have been embossed in black. The two little birds embossed in gold. Correspondence has just been stamped using black memento along with priority. The priority stamp is from Chocolate Baroque. The card has been finished off with black soot distress ink sponged around the edges.


The second card was created by covering the base with broken china distress ink then placing the bird cage mask from That Special Touch Of onto the ATC and then spritzing sunflower glimmer mist over the top. When dry Correspondence and the birdcage and branches from Words Like Honey were stamped over the top using black memento ink. As before the edges of the card were sponged with black soot distress ink.


The butterfly and dragon fly card was created from stamps by Chocolate Baroque. Firstly the base card was spritzed with a red glimmer mist then when dry a leaf mask from creative expressions (That Special Touch of)was placed on the card and then a green glimmer mist sprayed over the top. When dry the butterfly and dragonfly was stamped onto the card using a green and orange memento ink. The detail stamp for the butterfly and dragon fly was then over stamped using black memento ink.


The clocks ATC card was made the Time set of stamps from Creative Expressions, however I must confess that I have lost the stop watch from my set so had to substitute it for a very similar stamp that I found in my stash ooops! I covered the card with a dab of colour in stone from Stamps Away and then some pumpkin dab of colour. I stamped the stopwatch in blue Versafine and then placed a mask that i had cut from a sticky note over the top of the stopwatch. I then stamped the clock background to the top half of the card using the blue vesafine and then in brown memento I stamped the sentiment. I have used Promarkers to colour in the edges of some of the clocks and gears. The card has been finished off with edging the card with ocean Dab of Colour.


These last two ATC's were sponged with stone dab of colour from Stamps Away before being stamped with Darkroom Doors playing cards. The queen of hearts has been stamped using red memento and the hearts have been glittered with red stickles. The edges have been embossed in black. The urgent stamp from Chocolate Baroque has been stamped with black memento. The Ace of spades has been stamped using black memento and then sponged a bit with black soot distress ink to create the smudges. The edges have been embossed by mixing glitter red and black embossing powders together.


So there you have it one finished project.............

Saturday, 25 June 2011

Butterfly Fantasy

Evening crafters. The card I have to share with you this evening is another teenager's card. It's all I seem to be making at the moment lol. The stamps used are from Inkadinkadoo and the circular background stamp is from Hero Arts. I have added a dab of crystal stickles glue and glossy accents to some of the design and the 3 butterflies at the bottom of the card have been clear embossed and mounted on the card using 3d foam. Simples....

Tuesday, 21 June 2011

Ooops better late than never.....!

Oh dear, blog has been a bit neglected of late, must try harder....... Anyway here is the father's day card I made for my daughter to give to hubby. I think he liked it, neither Katie or myself were up when he opened it as he got up at stupid o'clock to go and watch paint dry, sorry, cricket at the Rose Bowl in Southampton. The stamped image has been coloured with the usual promarkers and distress inks.


Saturday, 11 June 2011

Thank Ewe

This is one of the cards that I made for Katie to send as a thank you for the birthday presents that she was given. I have never used this Papermania stamp before, so as I have had it for ages I thought I had better get some use out of it!
The card has been coloured with distress ink and promarkers and the "Thank Ewe" was added with the Xyron design runner.

Tuesday, 7 June 2011

Hi crafty people. The quick little card I have to share today was made in 20 minutes with no mistakes so quite a miracle really. The outside edges have been stamped with Teeny Weeny Meadow stamps from Chocolate Baroque and the wheelbarrow and sentiment are from PaperMania. The flowers and grass have been coloured with Promarkers and the whole card has been sponged with sage and old paper distress ink. Card is now sealed and in the post within the hour.

Monday, 6 June 2011

Heart Hanger

Good day to you all. This heart hanger that I have to share with you today was made for my daughter's recent birthday. I have had the chipboard hearts for eons and done nothing with them other than inked or painted them and then they were left discarded in my cupboard. So I decided to take pity on them and use them for what they were intended! I had already coloured this in lilac ink and paint and stamped the background swirl stamp all over it, but I then added the faux pen stitching and glued the gold and white cord around the edge. Once the glue was dry I added the beads using a beading needle and nymo thread. The letters, heart, crown and flower have all been cut on my trusty Cricut and the hanging ribbon was found buried in my ribbon box. I finished off the hanger by gluing a blank chipboard heart to the back. I have to admit that I was quite pleased with the finished product.
Thanks for looking and will be back soon.............


Saturday, 4 June 2011

Gift Card Bag

Evening peeps. I have something slightly different to share this evening, not a card, but a gift card holder. As part of my daughter's birthday present we gave her some gift cards which on their own are completely boring so I made this little holder to try and cheer them up a bit. I started off with two blank chipboard bag shapes which I got from Craftwork Cards and then covered them with patterned paper. I smoothed the edges with sand paper and then went over them with a silver marker pen. The flower embellishments were cut on the Cricut and a few beads added for interest. I then cut down some small envelopes and stuck them back to back to form the little card holders and then attached either side to the inside part of the "handbag"

I have to be honest and say that I completely stole this idea from Julie Hickey, when I saw her at last years Newbury show, but until now had not had the need to make one.

Thanks for looking, will be back soon with another birthday make.


Thursday, 2 June 2011

13th Birthday Card

Evening, the card I have to show is my daughter's birthday card. I really didn't know where to start with this. I had a pair of old jeans that have been left on the side of my craft room for ages just waiting to be used for "something creative" so I decided that time had come! I cut a small piece of the denim and attached it to some floral paper with some double sided tape. I then made the lace holes with a crop o dile and set the eyelets before adding the cord. The elements of the card have been cut on the Cricut and attached to the card using Pinflair Gel.
I have a couple more crafty bits that I made for Katie's birthday so will be back very soon.....


Tuesday, 24 May 2011

teen card

Hello blogger peeps, can't believe where May has gone. No posts for nearly 3 weeks......oh dear standards have definitely crashed to the ground. Anyway the card I have today was made for a birthday at the beginning of May. The background was made with little individual stamps from Hero Arts. The flowers were cut using my fantastic Mother's day bouquet Cricut cartridge along with the number 14 and the birthday centrepiece was stamped using a Creative Expressions stamp set. Short and sweet, but hope to be back sooner rather than later..........

Friday, 6 May 2011

With Men in Mind......

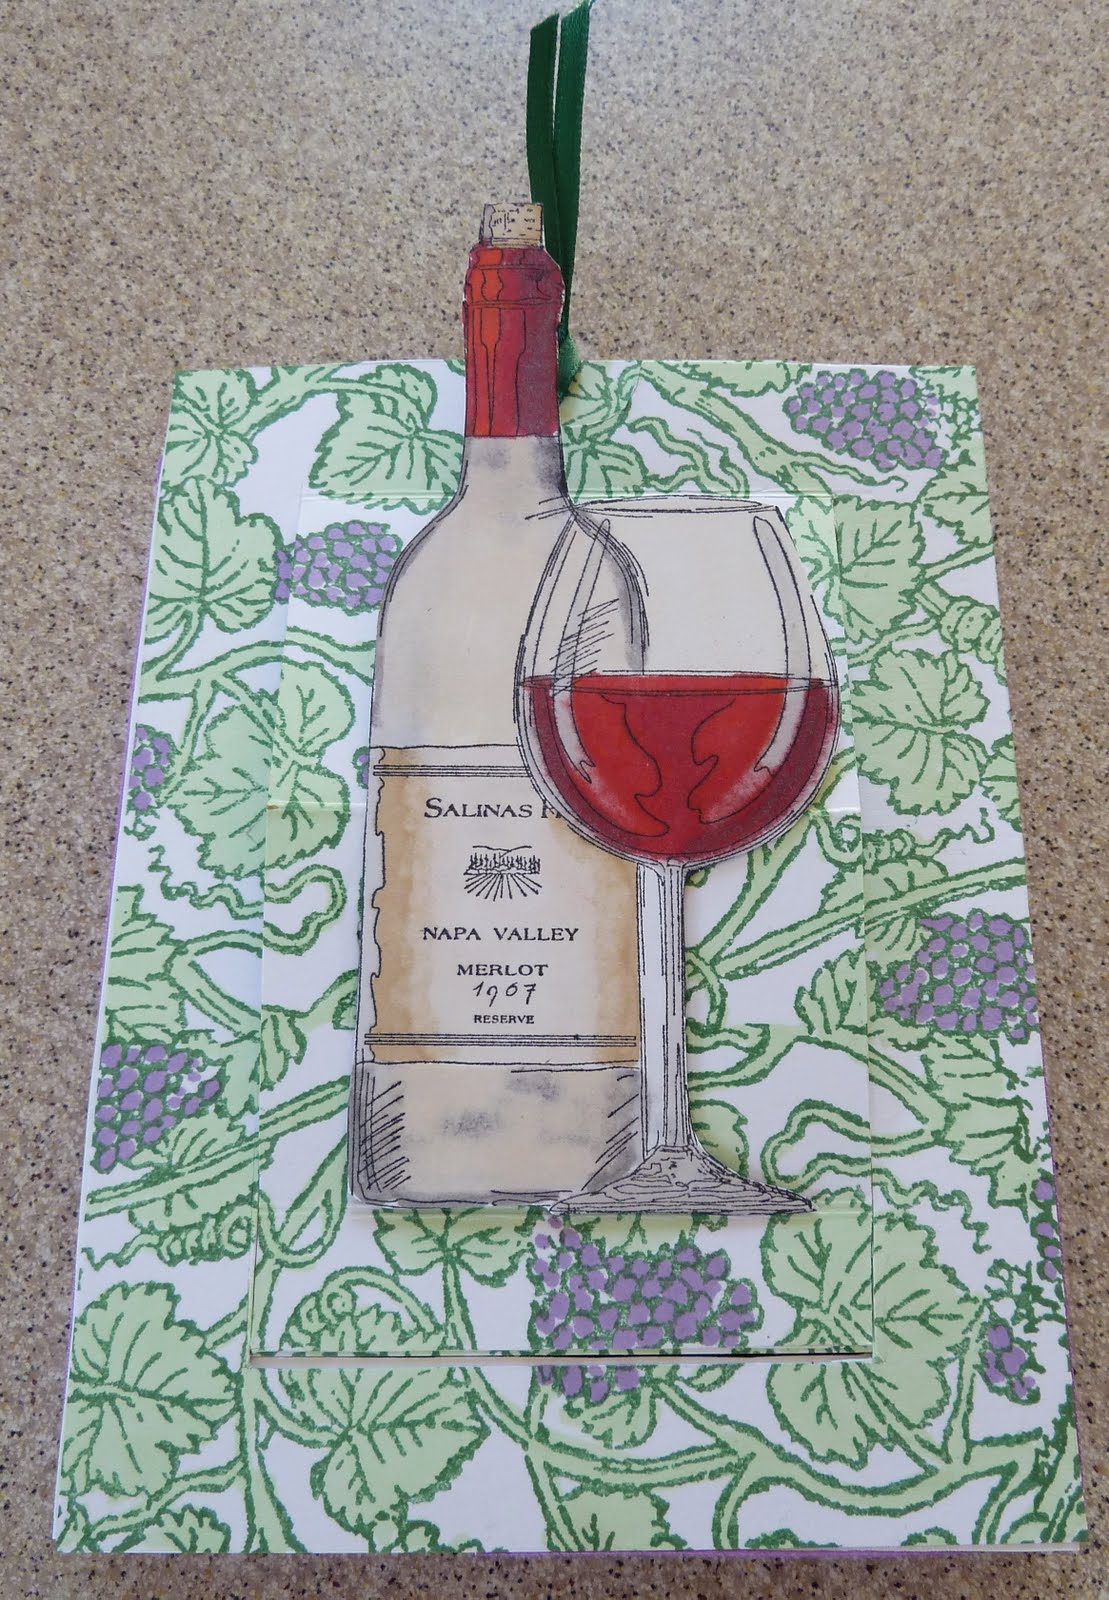
Hello blogland people, I have something a bit different to show you today. It's a gift box that I made from the Slider Template which Creative Craft Cabin sell. It comes with full instructions on how to use it and basically you can use it as a slider on a card or make it into a stand alone box, or if you want your cake and eat it, mount the box on the card lol.


I used a background stamp from the Stamp Man for the grapevine and coloured it in using Promarkers and the glass and bottle is a stamp from Stamps Happen and again coloured with Promarkers. The sentiment inside the box is from Hobby Art.


I have titled this with men in mind as I think it would make a good Father's Day idea but of course most of us are partial to a drop of grape juice so would be suitable for anyone that likes a drink or three.....


Tuesday, 3 May 2011


Hello, hope you are all well. The card I have today is something for the fellas. My husband needed a card for a friend in his office and asked me to make something with cricket and rugby on it. After having a bit of a look in my crafty stash I found some suitable stamps. The background, rugby player and cricketer are all from the Stamp Man. They have been stamped with Memento ink and then coloured with Promarkers. I have also added some distress ink around the edges just to add interest. The rugby and football balls were just lurking in my cupboard and i have no idea where I got them from and the sentiment is from Hobby Art.


Thanks for looking and will be back soon............


Sunday, 1 May 2011

Happy Anniversary

Afternoon all, I knew it wouldn't last very long with a post every day but I will do my best to post more often........
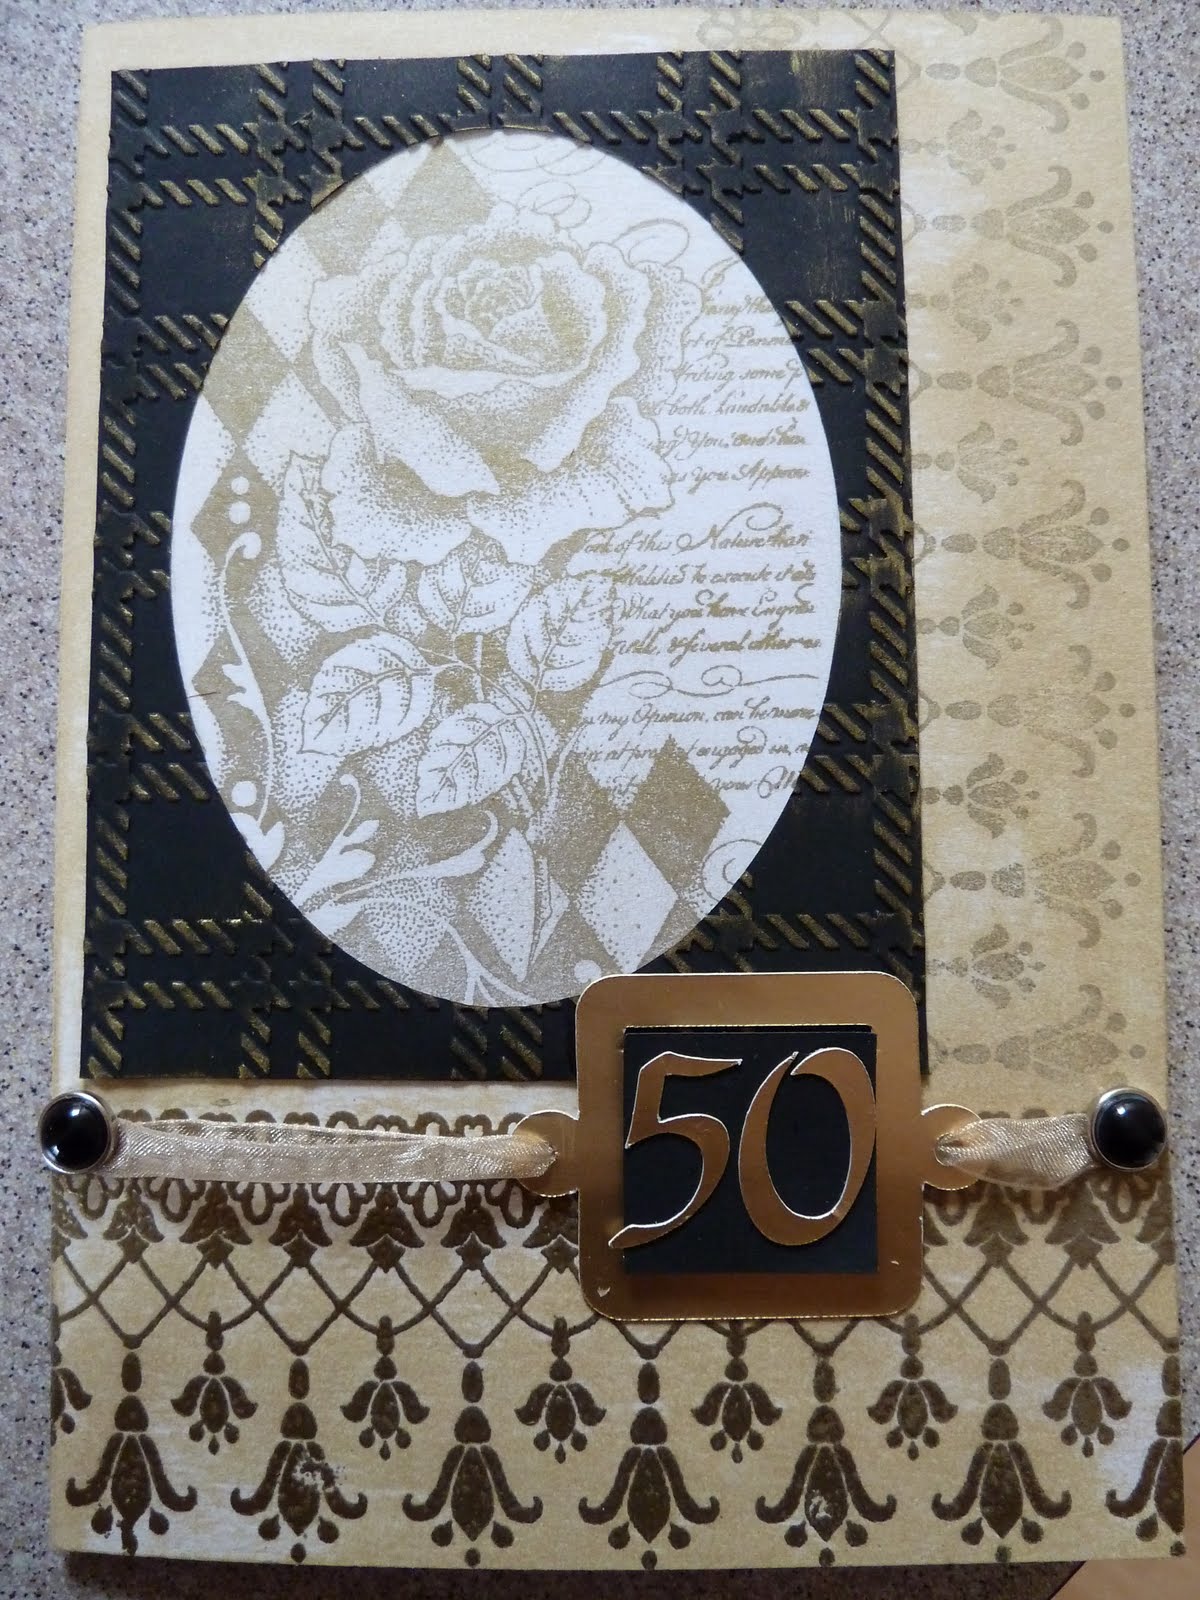
Anyway the card I have today was for a friend's 50th wedding anniversary. The stamps for this card are all from Chocolate Baroque. The frame was cut using a Sizzix oval and then embossed with a plaid Cuttlebug embossing folder. I then went over the embossing with gold rub on. The 50 was cut using the Cricut and finished off with organza ribbon.