Tuesday 22 December 2009

Merry Christmas

Wow we have had alot of snow! Reading ground to a halt last night and my poor husband had to walk home as there were no buses - it took him 2 hours!
Never made it to the hospital to visit my mum so we are hoping there will be some sort of bus service later today as it's way to dodgy to drive the car.
After taking the photos the other day of Katie in the snow, I decided to turn one of them into a Christmas card for my mum. Hope it helps to cheer her up as she will be in hospital over Christmas.

Friday 18 December 2009

Christmas Snow?

Christmas is just around the corner and the snow has arrived, are we in for a white Christmas? I took these pics this morning when my daughter, Katie dragged me out into the garden to make Frosty. First day of the Christmas holidays as well so can't be bad.
Sorry I do not have anything crafty to share with you. My Mum has not been well and is now in hospital so I have really not felt in the mood to create anything. I am afraid to say that everyone has got shop brought cards this year :(
Katie and Frosty.


The making of Frosty!

Tuesday 1 December 2009

How Old?

It's a big happy birthday for my husband today, he has reached the grand age of 50. I feel I am still in a position to poke fun at his age as I am still quite a way off this ripe old age. Dam I was trying not to use the word "old" but it just slipped in.Lol.
Back to the card - this was quite a quick card for me to make, I often agonise over men's cards, but I had the beer stamp from Personal Impressions and knew I was going to use it so the rest just followed. The ink used is Vintage photo distress ink, the background stamp is a Judikins cube from Stamp Addicts, the letters and numbers have been cut on the Cricut using the Jasmine cartridge, the tags were cut from a Sizzix die and the stripy paper is by Junkitz.

Monday 30 November 2009

Encaustic Art Part 2


Here are some more of my encaustic designs, I really love playing with melted wax, it creates some wonderful pictures that would take you forever to achieve if you were using paint.


Saturday 28 November 2009

Encaustic Art

Hi everyone, hope you are having a great weekend. My mojo has well and truly upped and left so nothing new to show you as such, so I thought I would go for a bit of a change. After having a house sort out I came across some encaustic art designs that I had created a while back. For those of you that do not know, encaustic art is just coloured wax melted onto an iron and then smeared across a glossy card. The way you move the iron across the page determines the marks made on the card, cool eh? It is so easy although I am never sure how the picture is going to turn out. I just stop when I like what I see.
Hope I can get into my creative flow again soon as I need to make some Christmas cards, I may have to commit the sin of buying some! I know shocking isn't it? Bye for now, will be back soon to show some more encaustic pics.

Thursday 12 November 2009

More Inky Bits

Hi all, hope you are ok, just thought I would squeeze a quick post in this afternoon. Have been messing around with my Whisper Dye inks. I did have the intention of brayering with them, but as I didn't know what the hell I was doing I went back to what I know and just used the ink straight from the pad, onto the glossy card, much easier........... I started with pink and then red in the middle of the card and then went around the outside with a light and then a dark green. I decided the middle of the card was too red, so I toned it down by rubbing over some yellow dye ink which seems to have worked. The swirl border has been stamped in green staz-on and the Inkadinkadoo humming bird and flower have been stamped in black Memento ink. Very simple and very quick. I really need to attack my craft room so that I can do something a bit more involved as it is such a mess, quick and easy is all I can muster at the mo!

Friday 6 November 2009

Happy Birthday Mum

Tomorrow is my Mum's birthday and we are all going out for a meal to celebrate, which I am really looking forward to. I made this card for her using a download courtesy of Jak Heath from Crafters Kitchen for the flower and and the card used for the swirl and letters. The rest is from my craft box. The base card has been embossed with holographic after being stamped with a Laura Ashley flower stamp with a clear embossing pad. The letters and swirl have been cut on the Cricut, the leaves are a sizzlit die which has been coloured with ink and then sprayed with a clear varnish and the scallop was punched from a Woodware hand punch. The little lilac flower that has been stamped in the background has come from my new Kanban tree stamp set and finished off with little purple flat backed gems.
Hope you all have a great weekend. See you soon.


Tuesday 3 November 2009

Inky Experiment!

Hi all, hope you are well, I was meant to be tidying my craft room, but when I unearthed some dye inks that I had completely forgotten about I couldn't resist a play. I tore a rough edge on some scrap paper and placed it against this glossy card and just swiped the dye inkpads across. I then stamped a hero arts script stamp all over the card using a beige Brilliance ink and then stamped the row of trees three times using brown Memento ink. The trees come from a brilliant clear stamp set from Kanban. I love all the images on the spring and autumn kanban stamp sets and intend to play a lot more with them. Short and sweet but hope to be back again soon.

Friday 23 October 2009

Autumn Leaves

I couldn't let Autumn pass by without making a single card to celebrate the season. My craft room is still packed full of my daughters rubbish, sorry that should have been treasured possessions from when I decorated her room. The bedroom has now been completed and Katie has moved back in but she, sorry that should have been I have the task of sorting it all out and hopefully getting rid of some of the rubbish, sorry, treasured possessions.
So with all that taken into account , I don't have access to much of my craft things or space come to that so this card is not very technical at all..... Just a glimmer misted background which has been stamped on with leaves and swirls. The right hand edges have been decorated using a Martha Stewart punch, the three main leaves were stamped onto the glimmer misted paper, cut out and then sprayed with clear varnish and the base card along with the decorative strip of paper has been coloured using orange and brown distress ink and there you have it.

Monday 19 October 2009

I Give Up!


Not me but my daughter trying to do her art homework yesterday. She was set the task of recreating a MC Escher piece of art. She had created a masterpiece last week but apparently her mean art teacher said it wasn't a patterned MC Escher piece, so she was set the task again! Katie finds drawing hard and after struggling for what seemed like ages she finally gave up and slid under the table to escape! Lol.
Sorry I haven't got any craft to share just yet as I have been decorating Katie's bedroom and it is finally finished, hoo flaming hooray, so hopefully we can get the house straight and normal service will be resumed pronto!

Saturday 10 October 2009

Flower Canvas

Hi all, hope your weekend is going well. This week I have been experimenting with canvas painting. This is my second attempt as the first fell by the wayside. I am reasonabley pleased with my efforts and appart from drying time it was quite quick to do. I started off painting the canvas with a cream emulsion paint as I had it lying around in one of those little tester pots. Whilst the paint was still wet I worked in the green acrylic paint. When dry I glued the script backing paper to the canvas using a mixture of water and PVA glue. When this was dry I added the light brown acrylic paint and then created the swirls with a pearl bronze pen.
The flowers have been punched from Grunge Paper, then sprayed with glimmer mists before being over stamped using a Tim Holtz background stamp. The flowers were then assembled and glued to the canvas using silicone.


The bird is a Tim Holtz, Grunge Board die cut which I have inked using glimmer mists and various ink pads. It has then been overstamped using a Tim Holtz dotty background stamp along with a Kars swirl stamp. I then partly embossed the bird using a Cuttlebug swirl embossing folder. The bird has been glued to the canvas using silicone.
Thats all folks, bye for now.


Tuesday 6 October 2009

Birthday Girl

This card was made with minutes to spare. My daughter came home yesterday and said she needed a card by Tuesday (today) for her friend.....aaahhh! Didn't have time to do anything yesterday so earlier today I headed straight for my Stamp Addict's Girls stamps and trusty Cricut machine and came up with this. The green frame, sentiment, circle, flower and numbers have all been cut using George and Stretch Your Imagination cartridges. The stamped image has been coloured using Promarkers, the background has been made by dragging dusty concorde and peeled paint distress ink pads across the base card in opposite directions to each other to create a kind of wild tartan pattern. As you can see distress ink has been applied to most bits of the card. I can't seem to make a card without applying even just the smallest bit of distress ink in some way:)

Saturday 3 October 2009

Magenta Flower

Hi all, the card I have for you today is made using a Magenta Rubber stamp that I have had for a couple of years. I was trawling through the box where most of my wood mounted stamps are kept, came across this and decided to give it another whirl using Pro-Markers to colour it in. This was a really speedy card to make. The base card has been stamped in green Brilliance, using a flourish stamp from Kars, then an aubergine coloured card was added before mounting the white square card that has again been stamped like the base card. The flower has been split into three layers although it could easily have been more and glued using silicone.

Wednesday 30 September 2009

Chocolate Swirls

Good morning. Today I have a card in chocolate brown with orange and yellow tones, sounds delicious doesn't it especially with chocolate swirls, but this folks is completely calorie free, yay!
I have used a Inkadinkadoo clear stamp set for the inch wide mountboard tiles, the swirl background is a Tim Holtz stamp and the sentiment and large flourishes have been cut on the Cricut using a Home Accent Solutions cartridge.
The tiles were spritzed with yellow and orange Glimmer mists and then the images were stamped on after they were allowed to dry using brown Versafine Ink. I then clear embossed them so they look like mini ceramic tiles. The flourishes and dream sentiment have been spritzed with gold glimmer mist and the base card has had a bit of distress ink added to it for good measure and there you have it.

Monday 28 September 2009

More Cakes

Like I said in my previous post I love these cupcakes from Creative Expressions. The centre panel cake has been triple embossed onto a piece of mountboard. I used clear embossing powder but mixed in some pink perfect pearl powder. I think it almost looks like icing, really yummy! The cakes along the edge have been painted using the Ranger Perfect Pearl powders mixed with water. The background has been created using a piece of tissue that has been dipped in the paint mixture and dabbed across the card.


Saturday 26 September 2009

Kitchen Towel!!........what?

Odd title I'm sure you will agree, but if you are stuck for a background paper then it needn't cost much, just nip into the kitchen, grab yourself some preferably plain white kitchen towel and you're away. I dabbed the distress ink that I had used for the card across the kitchen towel and then sprinkled with sparkly gold embossing powder, then heated with the heat gun. If you think the towel may absorb the ink too quickly then go over it with some clear embossing ink such as Versamark. I'm sure if you experimented you could create some other fantastic effects.
The flower and the girl's dress which is a Creative Expressions stamp, has been created from a home made paper sheet as well. I swiped a grey and an orange distress inkpad across some heavyweight card and then spritzed with water so the colours merged together. When dry I stamped the image and just cut out the dress. I then cut the flower from the same sheet using a spellbinders die.

Friday 25 September 2009

Yum yum.........

I love this cup cake set of stamps from Creative Expressions, really versatile. The base card has been sponged with mustard seed and dusty concorde distress inks and the cakes and fruit have been stamped and embossed in black before being coloured with Crystal Lacquers.
The centre cake has been layered onto a label shape cut from yellow card that has been edged with dusty concorde using a spellbinder die. The main cake has been painted with H2o's. The top of the cake has been decoupaged and the sprinkles have been added with a creamy lilac crystal lacquer pen. The card has been finished off with the little yum yum circular stamp that comes from the set.
That's it for now folks, enjoy your weekend.

Wednesday 23 September 2009

Tree Landscape

Hope you are all ok on this rather dull Wednesday afternoon.
I created this tree card with one of Sheena Douglass' stamp sets which have been produced by creative expressions. The base card has been stamped with the little foliage stamps from the set which have been stamped using greens and browns from the Distress Ink range. The tree panel was painted with water and then a selection of Ranger Perfect Pearl powders were applied to the wet background. Once dry the tree was stamped with brown versa fine ink and then decorated with the foliage stamps which come with the set. I tried to make the ground look like the ground by swishing a brown distress ink pad across the page and there you have it - one simple tree card.

Sunday 20 September 2009

Happy Anniversary

Hope your weekend is going well, we are off to the Newbury Show today so I thought I would sneak a quick post in before we go as another week has sailed by and no post to show for it.
My husband asked me to make this card for his friends who have been married for 25 years. Wow that seems such a long time, we have just celebrated being married for 16 years, 25 seems way off! This card was made with no frills as you can tell. Simple stamped background using a heart stamp from Elusive Images and silver galaxy ink. The hearts, letters and numbers have all been cut on the Cricut using George and Basic shapes cartridge and the congratulations sentiment was stamped onto plain white card and embossed with silver. 3 little flat back gems have been added for decoration. The silver mirri card on the hearts and the congratulations matt has been embossed with the swirl cuttlebug embossing folder.
I used some fab sticky backed glitter paper for the inside bit of the letters, this worked really well as there was no messy glueing for those pesky little letters.
I now only have two days left of my little temping job so hopefully normal crafting will resume real soon, but then again I do have my daughters bedroom to decorate so maybe not........!!!

Saturday 12 September 2009

Following the Orange & Yellow Theme

Apologises for the lack of blogging. I thought I would pick it up when my daughter went back to school, but I am now temping for two weeks in the office where my husband works! Yay for the extra cash poo to the lack of crafting time ho hum! Anyway I have made this card following along the yellow and orange theme that seems to have taken hold. I think it can only be because I never put the card away from the last crafting session tut tut:)
The flower is made from a spellbinders die along with the leaves. The background has been stamped onto the yellow and orange card using a Tim Holtz background stamp and then put through a cuttlebug embossing folder with a similar design. The ink used comes from the Distress Range as usual and the thank you stamp is an Anita's (I think).

Sunday 6 September 2009

Retro Flowers

Afternoon all. The card I have today has been made using the Retro Flower stamp plate from Elusive Images. There are some fantastic images in this set so I will definitely be dipping into these again. I have used a mixture of chalk and distress inks to stamp the vase and flowers.
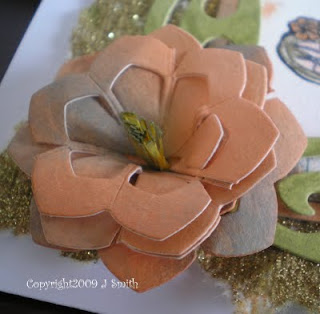
I made the flower in the top left corner from three punched flowers that have been cut up and glued together. It is something similar to Maria's rose design that can be found here, but I have changed the centre. The leaves have been cut from a Quickutz die and coloured with green distress inks. That's it for now folks, short and sweet I know but we're just dashing out for some scrummy tea :)

Thursday 3 September 2009

Shapes!

Today is the second day of my daughter being back at school so I thought I would sneak some more crafting in....yay!
Like my previous post this card has been made with two of Judikins cube stamps (Carol's cube and the line cube) and the ink used is red and yellow chalk ink. The two main designs have been stamped onto acetate and the frames around them have been cut on the cricut using George and basic shapes cartridge. The flower type shape was stamped using red staz on and yellow flat backed gems have been attached for decoration and the geometric design was stamped in black and embossed. Sections of the design have then been coloured with yellow and red gel pens and a few of the sections have been covered in dries clear glue and micro beads sprinkled on top. The decorative circles have been cut using the cricut and coloured with the inks and the square shadow stamp came from Carols Cube.

Sunday 30 August 2009

Flowers again....


Wow, where did the last week go? I have been so caught up with my daughter getting ready to start secondary school in September and sorting out decorating materials for her bedroom this week that blogging or anything linked to the computer has taken a complete back seat. We went to Stonor Park (near Henley, Oxfordshire) today for the craft show that is on over the weekend. We had a great time but the weather was a bit grey, however, I came across an unexpected stall selling rubber stamps hooray! My husband's heart sank as he got into a comfortable seating position for the long wait he had ahead of him :) The stall was called Stampeeze (not sure I have spelt that correctly) and they had a good selection of Judikins stamps so I bought the cube background stamp that the above card has been made with. It goes brilliantly with the Judikins cube that I have already which I think is called Carol's Cube (from Stamp Addicts)I started by stamping the blank square from Carol's cube in each corner using a burnt orange chalk ink and I then stamped the line background from my new cube over each square. I masked off the squares with a post-it and then stamped the bubble design from the new cube. The daisy design from Carol's Cube was stamped onto cream card, cut out and then glued onto the mount board that I had previously coloured with orange chalk ink and stamped the line background around the edges. The middle of the flower has been decorated with gold micro beads. The card was finished off with the outside edges inked with a brown chalk ink. Simples!

Sunday 23 August 2009

Under the Sea

Hi all, hope you are all having a relaxing weekend. My family and me have just come back from a car boot sale, selling off some of the toys my daughter has grown out of. We sold loads and made a tidy profit but we still had plenty to pack up and bring back! I think we have enough junk for plenty more car boot sales, oh hum!
The above card has been stamped using Elusive Images, Under The Sea stamp plate. The seahorses have been stamped onto acetate using blue staz on and coloured on the reverse, then cut out and stuck to the backing card. The shell and seaweed has also been stamped in the same way as the seahorses and coloured on the reverse using Tinka Bella inks from Graphicus. The background card is silver mirri card which has had blue and green alcohol inks sponged over it using a felt applicator. This card has really not photographed well and not being photographic savvy I don't really know how to improve so there you have it, the idea is there anyway :)

Thursday 20 August 2009

New Job (I wish......)

I am currently looking for a job as you can tell from the title, but not having much luck at the moment, but my husband's friend has obviously been lucky as it is her I made this card for. Nothing fancy, just used two sets of Dovecraft paper packs and the words and tag have been cut with the Cricut using the George cartridge. The tag has been decorated with flat backed gems.
Short and sweet today as not finding it very easy to blog and craft while the school holidays are here, hopefully get back in the swing of things in a week or two.

Sunday 16 August 2009

Butterfly Collage

Hi all, I can't believe it's a week since my last post. This week has flown! When ever I walked past my craft room this week I have been dabbling with this card, I never had a clear picture of what it would look like when I started to make it. I started off with the background which was a piece of white card that had been sprayed with orange and red glimmer mists. I did this ages ago and the card had been lying around unused, so I just picked it up. See that's one of the benefits of having an untidy craft room, you don't have to look far before you stumble on something to give you inspiration! My excuse and I'm sticking to it! :)
The collage bit has been stamped using black Versafine and the stamps used are a mixture of Elusive images for the flower, scroll corner and butterflies and Chapel Road Art Stamps for the harlequin script. Elusive Images do a fantastic butterfly collage already made up but I decided I would like to have ago at creating a collage myself. What do you think?

Saturday 8 August 2009

For Mum


hi folks, finally back from my holiday from lovely sunny/cloudy/rainy Weymouth. Have any of you had similar weather on your hols this year or have you all been blessed with sunshine all the way? We had just about all of the seasons weather apart from snow! Anyway I shall get back to this card which hasn't photographed that well but I'm sure you get the idea! The main image which is a Laura Ashley stamp has been stamped onto an acrylic square using black staz-on. On the reverse of the square, green alcohol ink has been sponged onto it. A hole has been punched into the bottom corner so that beads can be threaded through. The acrylic square has been mounted onto a frame cut on the cricut using a Home Accents Solution cartridge. Some of the background flowers have been cut on the Cricut but using the George cart. This was also used for the tag and the MUM sentiment. The same Laura Ashley flower has also been stamped for part of the background but the ink used was a brown chalk ink.

I can't believe I won!


I entered the June Graphicus challenge as I try to do each month and I have just found out that I actually won! I am so pleased as I really enjoyed making the necklace and box that I entered it with. You can see my original post here

Saturday 1 August 2009

Stamp Addicts Floral Cube

Evening folks. I am typing this from the bar in the holiday resort so I will keep this short as it is hard to type in the dark! This card was made sometime ago using a stamp addicts cube stamp. The inside of the card was stamped onto fibres and coloured with gel pens. The front of the card was stamped and then masked. When the mask was in place I covered the panel with embossing ink and then sprinkled clear embossing powder over the top. Whilst it was heated up I sprinkled Ranger Perfect Pearls into the clear embossing to try and make a marbled finish. I then painted the flower with water colour paint.

Elusive Images Seahorse

Morning all. I am off on my hols today, but if I get near a computer while away I will try and post a few more pics up. Today I have a bit of a seaside feel to get me in the mood for my holiday, even if the weather looks a bit grim :( All of the stamps used are from the same Underwater, Elusive Images stamp plate. The base card has been spritzed with green and blue Glimmer mists. The seahorse has been stamped and embossed with clear and then water coloured and the shells started out as quite a large stamp but have been given the shrink plastic treatment to make little embellishments for the card.

Tuesday 28 July 2009

Safety Pin Bracelet

Drum roll please....Today is my daughter's debut on my blog with her safety pin and bead bracelet. I think it looks wonderful and she has made a brilliant job putting it all together. Katie doesn't share my enthusiasm for papercraft but she quite likes the idea of making things to wear so she had a go at this bracelet. Its just a collection of small safety pins that she has threaded with 5 seed beads each before closing the fastener, then the tops and bottoms of the fasteners have been threaded with black elastic, but alternated with a larger bead. When you have a row big enough to fit your wrist the opposite ends of elastic are tied together.
I wouldn't recommend this for small children in case they fiddle with the safety pins as they could come undone.

Monday 27 July 2009

Paisley Canvas

Hi folks, just a quick post today. I made this canvas sometime ago but though it was worth a show. I painted the canvas with watered down acrylic paints. Stamped the flowers and paisley design (I think the set is one of the Woodware clear sets)onto some tissue using black staz-on and then pasted onto the canvas with a mixture of pva glue and water. The larger flower shapes that have been cut from black paper using a Sizzix die have been decoupaged with silicone glue and H2O paint has been splattered onto them.

Saturday 25 July 2009

Sew Simple!

Today I have a stitched flower card to show you. The stamp is from Elusive Images and has been stamped onto Grunge Paper. The image has been distressed around the edges with distress ink and the main flower design has been painted with Inktense water colour paints and then stitched. The backing papers are both from Dovecraft paper packs. The base paper has been inked with Peeled Paint Distress Ink. The happy birthday was stamped onto the same base paper and then stuck to some spare card to make it rigid so that it could be mounted onto the card with foam squares. As you can see most of the corners have been attacked with a round corner punch.

Friday 24 July 2009

So simple!


Hi all, this card I have today is so simple it took minutes to make. The backing paper is from Junkitz - Girl Collectionz and the T Shirt and Shorts rubber stamps are from Artifacts and they were all part of my blog candy prize from Maria over on Imagine, Create, Inspire. Both the top and shorts have been coloured using Pro Markers and attached to the backing paper using silicone glue. I have a clear alphabet and number set which I used to stamp the recipients name and age on the T shirt (luckily it's a short name!). I cut the front of the card slightly narrower than the back and wrote Happy Birthday down the side of the inside edge. I find if you add dots to the letters it tends to disguise uneven writing and neatens up handwritten sentiments. I put a strip of masking tape alongside the Happy Birthday and then sponged red and blue distress ink over the wording.
The right hand corners of the card and backing paper have been rounded off with a corner punch and the card has been finished off with three punched stars stuck to a strip of card which has been attached the the bottom of the design.

Wednesday 22 July 2009

Last of the School Cuties!

The title says it all really, this is the last of the cards I made for the teaching assistants and as you can probably spot it is another Popcorn Bear from Crafters Companion. As in previous posts this has been coloured with Pro Markers and the backing paper has been designed by Craftwork Cards that was given free with Creative Cardmaking Magazine.

Tuesday 21 July 2009

Teacher's Memory Book

Hi all. Today is a milestone in my daughter's life as it's her last day at primary school so I decided to make a mini memory album for her teacher. The picture above is the gift box I made to go with it. The flowers are from Kaiser Craft and have been decorated with green and pink ink and finished off with a button and flat backed gems. The box started out as a plain piece of white card but I sponged pink Brilliance Ink across it and then added a little white Brilliance to tone it down before stamping the Hampton Art Swirls across again in pink Brilliance.


The above picture is the front of the book. The whole book is made from wood blanks from Kaiser Craft which I painted with pink acrylic paint on one side and light green acrylic paint on the other. I stamped the swirl stamp over the front as I did for the box and added a decorative flower. The letters are die cut Grunge Board from Tim Holtz which have been painted with light green acrylic paint and stamped over with a flower stamp with pink ink. Funky fibres, ribbon and a piece of broken necklace has been added to the binder ring.
This is one of the pages inside the book, decorated with Cricut Solutions, Home Accents cartridge, some lacy ribbon, funky fibres, buttons and Kaiser Craft Flowers.
This page has a little pocket for a tag that my daughter has written her message on for her teacher and again a couple of Kaiser Craft flowers have been added. The die cut letters are Quickutz and they have been sponged with Peeled paint distress ink.
There are other pages to the book but I have not added these as they include photos of children from my daughters school.