Good morning. Today I have a card in chocolate brown with orange and yellow tones, sounds delicious doesn't it especially with chocolate swirls, but this folks is completely calorie free, yay!
I have used a Inkadinkadoo clear stamp set for the inch wide mountboard tiles, the swirl background is a Tim Holtz stamp and the sentiment and large flourishes have been cut on the Cricut using a Home Accent Solutions cartridge.
The tiles were spritzed with yellow and orange Glimmer mists and then the images were stamped on after they were allowed to dry using brown Versafine Ink. I then clear embossed them so they look like mini ceramic tiles. The flourishes and dream sentiment have been spritzed with gold glimmer mist and the base card has had a bit of distress ink added to it for good measure and there you have it.
Wednesday, 30 September 2009
Monday, 28 September 2009
More Cakes
Like I said in my previous post I love these cupcakes from Creative Expressions. The centre panel cake has been triple embossed onto a piece of mountboard. I used clear embossing powder but mixed in some pink perfect pearl powder. I think it almost looks like icing, really yummy! The cakes along the edge have been painted using the Ranger Perfect Pearl powders mixed with water. The background has been created using a piece of tissue that has been dipped in the paint mixture and dabbed across the card.
Saturday, 26 September 2009
Kitchen Towel!!........what?
Odd title I'm sure you will agree, but if you are stuck for a background paper then it needn't cost much, just nip into the kitchen, grab yourself some preferably plain white kitchen towel and you're away. I dabbed the distress ink that I had used for the card across the kitchen towel and then sprinkled with sparkly gold embossing powder, then heated with the heat gun. If you think the towel may absorb the ink too quickly then go over it with some clear embossing ink such as Versamark. I'm sure if you experimented you could create some other fantastic effects.
The flower and the girl's dress which is a Creative Expressions stamp, has been created from a home made paper sheet as well. I swiped a grey and an orange distress inkpad across some heavyweight card and then spritzed with water so the colours merged together. When dry I stamped the image and just cut out the dress. I then cut the flower from the same sheet using a spellbinders die.
Friday, 25 September 2009
Yum yum.........
I love this cup cake set of stamps from Creative Expressions, really versatile. The base card has been sponged with mustard seed and dusty concorde distress inks and the cakes and fruit have been stamped and embossed in black before being coloured with Crystal Lacquers.
The centre cake has been layered onto a label shape cut from yellow card that has been edged with dusty concorde using a spellbinder die. The main cake has been painted with H2o's. The top of the cake has been decoupaged and the sprinkles have been added with a creamy lilac crystal lacquer pen. The card has been finished off with the little yum yum circular stamp that comes from the set.
That's it for now folks, enjoy your weekend.
Wednesday, 23 September 2009
Tree Landscape
Hope you are all ok on this rather dull Wednesday afternoon.
I created this tree card with one of Sheena Douglass' stamp sets which have been produced by creative expressions. The base card has been stamped with the little foliage stamps from the set which have been stamped using greens and browns from the Distress Ink range. The tree panel was painted with water and then a selection of Ranger Perfect Pearl powders were applied to the wet background. Once dry the tree was stamped with brown versa fine ink and then decorated with the foliage stamps which come with the set. I tried to make the ground look like the ground by swishing a brown distress ink pad across the page and there you have it - one simple tree card.
Sunday, 20 September 2009
Happy Anniversary
Hope your weekend is going well, we are off to the Newbury Show today so I thought I would sneak a quick post in before we go as another week has sailed by and no post to show for it.
My husband asked me to make this card for his friends who have been married for 25 years. Wow that seems such a long time, we have just celebrated being married for 16 years, 25 seems way off! This card was made with no frills as you can tell. Simple stamped background using a heart stamp from Elusive Images and silver galaxy ink. The hearts, letters and numbers have all been cut on the Cricut using George and Basic shapes cartridge and the congratulations sentiment was stamped onto plain white card and embossed with silver. 3 little flat back gems have been added for decoration. The silver mirri card on the hearts and the congratulations matt has been embossed with the swirl cuttlebug embossing folder.
I used some fab sticky backed glitter paper for the inside bit of the letters, this worked really well as there was no messy glueing for those pesky little letters.
I now only have two days left of my little temping job so hopefully normal crafting will resume real soon, but then again I do have my daughters bedroom to decorate so maybe not........!!!
Saturday, 12 September 2009
Following the Orange & Yellow Theme
Apologises for the lack of blogging. I thought I would pick it up when my daughter went back to school, but I am now temping for two weeks in the office where my husband works! Yay for the extra cash poo to the lack of crafting time ho hum! Anyway I have made this card following along the yellow and orange theme that seems to have taken hold. I think it can only be because I never put the card away from the last crafting session tut tut:)
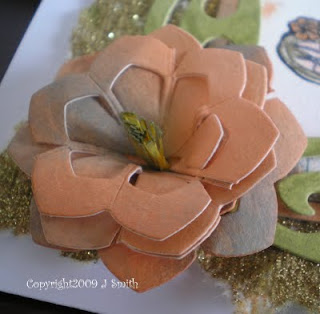
The flower is made from a spellbinders die along with the leaves. The background has been stamped onto the yellow and orange card using a Tim Holtz background stamp and then put through a cuttlebug embossing folder with a similar design. The ink used comes from the Distress Range as usual and the thank you stamp is an Anita's (I think).
Sunday, 6 September 2009
Retro Flowers
Afternoon all. The card I have today has been made using the Retro Flower stamp plate from Elusive Images. There are some fantastic images in this set so I will definitely be dipping into these again. I have used a mixture of chalk and distress inks to stamp the vase and flowers.
I made the flower in the top left corner from three punched flowers that have been cut up and glued together. It is something similar to Maria's rose design that can be found here, but I have changed the centre. The leaves have been cut from a Quickutz die and coloured with green distress inks. That's it for now folks, short and sweet I know but we're just dashing out for some scrummy tea :)
Thursday, 3 September 2009
Shapes!
Today is the second day of my daughter being back at school so I thought I would sneak some more crafting in....yay!
Like my previous post this card has been made with two of Judikins cube stamps (Carol's cube and the line cube) and the ink used is red and yellow chalk ink. The two main designs have been stamped onto acetate and the frames around them have been cut on the cricut using George and basic shapes cartridge. The flower type shape was stamped using red staz on and yellow flat backed gems have been attached for decoration and the geometric design was stamped in black and embossed. Sections of the design have then been coloured with yellow and red gel pens and a few of the sections have been covered in dries clear glue and micro beads sprinkled on top. The decorative circles have been cut using the cricut and coloured with the inks and the square shadow stamp came from Carols Cube.
Subscribe to:
Posts (Atom)